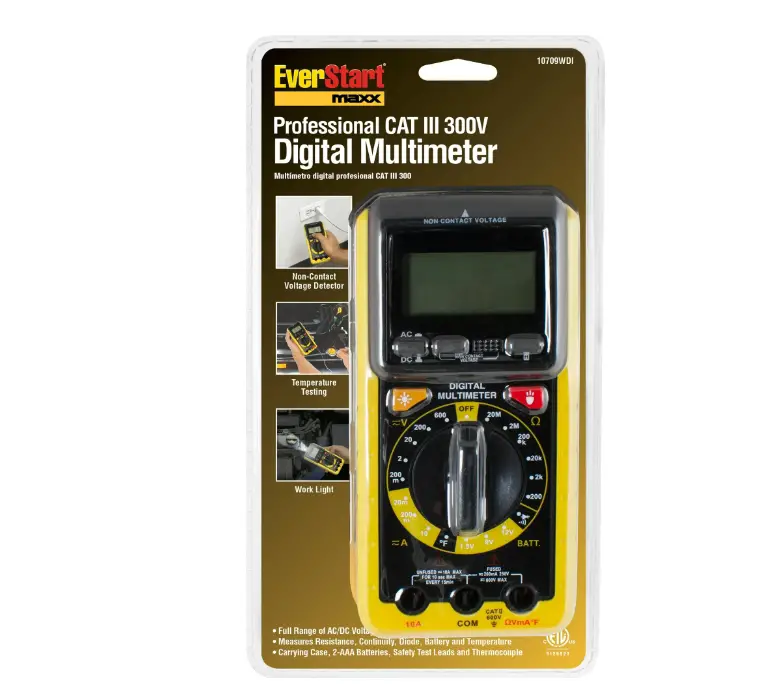
EverStart Professional Automotive 300 Volt Digital LCD Multimeter, 10709WDI, New, 5.5 in.
- EverStart Professional CAT 3 300 Volt Digital Multi-Meter:
- Everstart Maxx professional multimeter can be used in many home and auto testing applications
- Includes full range of AC & DC voltage and current testing capabilities
- Built in work light to illuminate poorly lit rooms and work spaces
- Display is back lit for ease readouts
- Measures resistance, continuity, diode, battery, and temperature testing
- Multimeter is enclosed in a durable rubber molded casing for protection and easy grip
- Multimeter comes with a non-contact voltage tester
- Includes test leads, batteries, thermocouple, manual
- Carrying case also included for storage and portability.
- Qty: 1 multimeter
$29.78
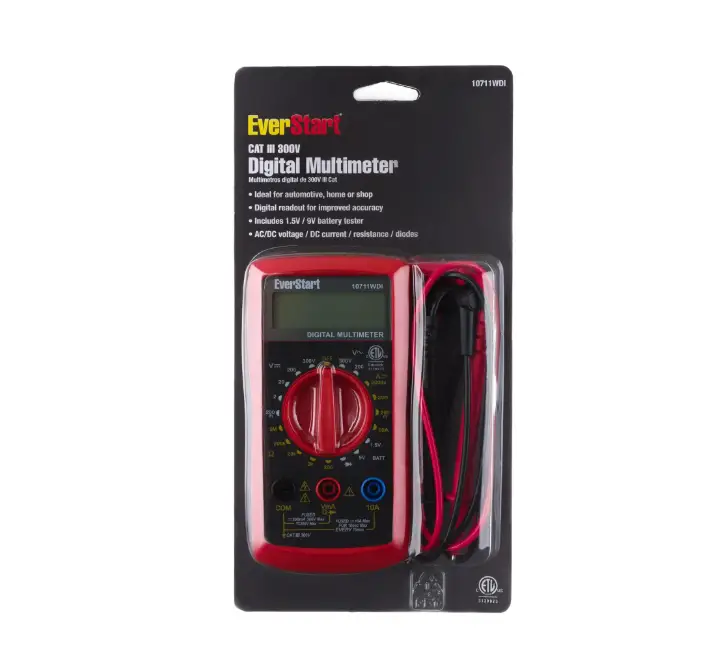
EverStart Automotive 300 Volt Digital LCD Multimeter, 10711WDI, New, 11 inch
- EverStart Value CAT 3 300 Volt Digital LCD Multimeter, Red and Black:
- Practical Functions: for measuring DC/AC voltage, DC/AC current, Resistance, Capacitance, Frequency & Duty ratio, Diode & Triode, Live wire, and LED test.
- Reliable Quality: the case was adopted with double color mold technology, which is more crash resistant and anti-shock than single color one, and comfort hand-held feeling.
- Large 3 1/2 digit LCD display with large digital-readout and backlight for clear reading in dark environments.
- Low Battery Indicator: remind you to replace battery to ensure measurement accuracy.
- Auto Power-off: 15mins automatic shutdown if there’s no operation to save power.
- Includes 1.5V / 9V battery tester
- Everstart multimeter can be used in many home, shop and auto testing applications
- Convenient, pocket size instrument
- Includes two safety test leads, instruction manual and 9V battery
- Qty: 1 multimeter
- Color: Black and Red Casing
$16.52
When I first decided to tackle my own car maintenance and home electrical projects, I stood in the automotive section of my local Walmart, staring at the Everstart Multimeter with equal parts curiosity and intimidation. That small handheld device with its mysterious dial and probes seemed to hold secrets that only professional electricians could understand. Fast forward three years, and I can confidently say that purchasing that multimeter was one of the best decisions I’ve made for my DIY journey. Today, I’m excited to share everything I’ve learned about this incredibly versatile tool that has saved me countless trips to the mechanic and electrician.
My Electrical Journey Begins
Let me take you back to that fateful Saturday morning when my car wouldn’t start. The battery seemed fine—the lights came on, but the engine just clicked weakly. Was it the battery? The starter? The alternator? Without the right tool, I was just guessing. That’s when my neighbor, Mike, came over with his Everstart Multimeter and showed me how to diagnose the problem in minutes. Turns out, my battery was putting out only 10.5 volts—far below the needed 12.6 volts for a healthy battery.
I was hooked. The next day, I owned my very own Everstart Multimeter, and a whole new world of DIY diagnostics opened up to me.
What Exactly Is the Everstart Multimeter?
Simply put, the Everstart Multimeter is a diagnostic tool that measures various electrical properties. Think of it as the Swiss Army knife of electrical testing. This compact device can measure voltage (both AC and DC), resistance, continuity, and in some models, even temperature, frequency, and capacitance.
The Everstart brand is Walmart’s house brand for automotive accessories, and their multimeters offer impressive functionality at a price point that won’t break the bank. The Everstart Multimeter is the perfect balance between professional capabilities and hobbyist accessibility, making it an essential tool for anyone who wants to understand what’s happening in their electrical systems.
The Feature Breakdown: What Makes the Everstart Multimeter Special
Having used various multimeters over the years, I’ve come to appreciate the thoughtful design of the Everstart models. Let me walk you through the key features that make this multimeter stand out:
Display and Interface
Most Everstart Multimeters feature a large, easy-to-read LCD display with clear digits. The premium models offer backlit displays, which I’ve found incredibly useful when working under the hood or in dimly lit spaces. The interface is straightforward with a central rotary dial that allows you to select the measurement function.
Measurement Capabilities
The standard Everstart Multimeter can measure:
- DC voltage (up to 1000V on higher-end models)
- AC voltage (typically up to 750V)
- Resistance (ohms)
- Continuity (with audible beep)
- DC current (amps)
The more advanced models also include:
- AC current
- Capacitance
- Frequency
- Temperature (with included thermocouple probe)
- Duty cycle
Auto-Ranging Functionality
This is where the Everstart Multimeter really shines for beginners. While older or cheaper multimeters require you to manually select the appropriate measurement range, many Everstart models feature auto-ranging. This means the multimeter automatically determines the correct range for your measurement, eliminating guesswork and reducing the risk of damaging the meter.
Build Quality and Durability
My Everstart Multimeter has survived being dropped on concrete, left in a hot car during summer, and even a brief rain shower when I forgot it on my driveway. The rubberized housing provides decent impact protection, and the overall construction feels solid considering the price point.
Accessories
Most Everstart Multimeters come with:
- Test leads with insulated probes
- Battery (usually 9V)
- User manual
- Protective holster or case
Some premium models include additional accessories like:
- Temperature probe
- Alligator clips
- Extra fuses
- Lead holders
How to Use the Everstart Multimeter: A Practical Guide
When I first held my multimeter, I felt a bit overwhelmed. All those symbols on the dial seemed like hieroglyphics! But after some practice, using the multimeter became second nature. Let me share the basics to get you started:
Setting Up Your Multimeter for the First Time
- Unpack your multimeter and check that all accessories are included.
- Install the battery (usually a 9V) in the battery compartment on the back.
- Inspect the test leads for any damage to the insulation.
- Connect the black lead to the COM (common) port and the red lead to the VΩmA port.
- Turn the dial to the OFF position when not in use to conserve battery life.
Testing a Car Battery: My Step-by-Step Process
This was the first thing I learned to do with my multimeter, and it’s still one of the most useful:
- Make sure your multimeter is set to measure DC voltage (look for the V⎓ symbol).
- For auto-ranging models, that’s all you need to do. For manual models, select a range higher than 15V.
- Touch the black probe to the negative (-) terminal of the battery.
- Touch the red probe to the positive (+) terminal.
- Read the display. A healthy, fully charged car battery should read between 12.4-12.7V when the engine is off.
- To test the charging system, start the engine and measure again. You should see 13.7-14.7V with the engine running.
The first time I did this, I discovered my alternator wasn’t charging properly, even though my battery was new. That knowledge saved me from repeatedly buying new batteries that would just keep dying!
Measuring AC Voltage in Home Outlets
After gaining confidence with my car’s electrical system, I cautiously moved to testing home outlets:
- Set the multimeter to AC voltage (look for the V~ symbol).
- Select a range higher than 250V for manual multimeters.
- Insert the black probe into the neutral slot (the larger slot) of the outlet.
- Insert the red probe into the hot slot (the smaller slot).
- Read the display. In the US, you should see around 110-120V.
Always exercise extreme caution when working with household electricity. The voltages present can be lethal if mishandled.
Testing Continuity: Finding Breaks in Circuits
This function quickly became my favorite for troubleshooting:
- Turn the dial to the continuity symbol (it looks like a sound wave or diode with sound waves).
- Touch the probes together – you should hear a beep, confirming the meter is working.
- Disconnect power from the circuit you’re testing!
- Touch the probes to the two points you want to test.
- If you hear a beep, there’s continuity (a complete path). No beep means there’s a break in the circuit.
I used this to find a break in my Christmas lights last year, saving me from buying a new string!
Measuring Resistance
- Set the multimeter to the resistance function (Ω symbol).
- For manual meters, select an appropriate range.
- Ensure the circuit is not powered!
- Connect the probes across the component you want to measure.
- Read the display. Lower numbers indicate less resistance.
Checking Fuses
One of the simplest yet most useful tests:
- Remove the fuse from its holder.
- Set the multimeter to continuity or resistance mode.
- Touch one probe to each end of the fuse.
- A good fuse will show continuity (beep) or near-zero resistance.
- A blown fuse will show no continuity or infinite resistance.
This has saved me countless hours of troubleshooting, especially with older vehicles where fuse boxes can be mysterious puzzles.
Advanced Uses for Your Everstart Multimeter
As I became more comfortable with my multimeter, I discovered it could do far more than just basic tests:
Diagnosing Parasitic Drains
If your car battery keeps dying overnight, you might have a parasitic drain:
- Set the multimeter to measure DC amps.
- Disconnect the negative battery terminal.
- Connect the black probe to the negative battery post.
- Connect the red probe to the disconnected cable.
- The reading shows how much current is being drawn with the car off. Anything over 50mA could indicate a problem.
Testing Sensors and Switches
Most modern cars have dozens of sensors that can be tested with your multimeter:
- Find the resistance specifications for the sensor in a repair manual.
- Disconnect the sensor from the vehicle’s electrical system.
- Set the multimeter to resistance mode.
- Connect the probes to the sensor terminals.
- Compare your reading to the specifications.
I diagnosed a faulty coolant temperature sensor this way, saving at least $200 in diagnostic fees.
Checking Ground Connections
Poor grounds cause all sorts of electrical gremlins:
- Set the multimeter to continuity or resistance mode.
- Connect one probe to a known good ground (like the negative battery terminal).
- Connect the other probe to the ground point you’re testing.
- A good ground will show continuity or very low resistance (less than 0.5 ohms).
Safety Precautions: Lessons I’ve Learned (Sometimes the Hard Way)
Using a multimeter is generally safe, but electricity demands respect. Here are safety tips I always follow:
- Never test voltage with the meter set to current or resistance mode. This can damage the meter or cause injury.
- Always start with the highest range when measuring unknown voltages.
- Keep your fingers behind the probe guards to prevent accidental contact with live circuits.
- Never use a multimeter with damaged test leads or cracked housing.
- Remove the test leads before opening the case to change the battery or fuses.
- Always disconnect power before measuring resistance or testing continuity.
- Use only one hand when possible when testing high voltages to reduce the risk of current passing through your heart.
- Wear insulated gloves and safety glasses when working with high voltages.
Price Points and Where to Buy
The Everstart Multimeter line offers options for every budget and skill level:
Entry-Level (Around $15-$25)
These basic models handle essential functions like voltage, resistance, and continuity testing. Perfect for beginners or occasional use.
Mid-Range (Around $30-$45)
These include auto-ranging, better accuracy, and additional functions like temperature testing. This is the sweet spot for most DIYers.
Premium (Around $50-$70)
These feature backlit displays, higher accuracy, PC connectivity, and advanced measurement capabilities. Ideal for serious hobbyists.
Walmart is the primary retailer for Everstart products, but you can also find them online through Walmart.com and occasionally on Amazon or eBay. I purchased mine during a sale for $29.99, and it’s been worth every penny.
Comparing Everstart to Other Multimeter Brands
Having used various multimeters, I can offer some comparisons:
Everstart vs. Fluke
Fluke multimeters are the gold standard for professionals, with prices often starting at $100 and going well above $500. They offer exceptional accuracy, durability, and safety features. However, for the average DIYer, the Everstart provides 80% of the functionality at 20-30% of the cost.
Everstart vs. Klein
Klein multimeters occupy the middle ground between professional and consumer-grade tools. They’re excellent but typically cost 1.5-2x more than comparable Everstart models.
Everstart vs. Harbor Freight (Cen-Tech)
Harbor Freight’s Cen-Tech multimeters are often slightly cheaper than Everstart, but in my experience, the build quality and reliability aren’t quite as good. I’ve had two Cen-Tech meters fail within a year, while my Everstart is still going strong after three years.
Warranty and Support
Everstart Multimeters typically come with a one-year limited warranty, which is standard for this price range. Keep your receipt, as Walmart handles warranty claims directly. While not as comprehensive as the warranties offered by premium brands like Fluke (which often have 3-5 year warranties), I’ve found Walmart’s return process to be painless when needed.
Accuracy and Reliability: Real-World Experience
How accurate is the Everstart Multimeter? Based on my experience and comparing readings with professional equipment:
- Voltage measurements are typically within ±1% for DC and ±1.5% for AC
- Resistance measurements are usually within ±2%
- Current measurements can be less accurate, typically ±2.5%
For DIY use and even most professional applications, this level of accuracy is more than sufficient. The only time I’ve needed better accuracy was when diagnosing sensitive electronics, which is beyond the scope of most home projects anyway.
Maintaining Your Multimeter for Years of Service
To keep your Everstart Multimeter in top condition:
- Store it in its protective case when not in use.
- Remove the battery if you won’t be using it for extended periods.
- Keep the probes clean and inspect them regularly for damage.
- Avoid exposure to extreme temperatures or humidity.
- Replace the fuse only with the exact same type specified in the manual.
- Clean the display and housing with a slightly damp cloth (never use solvents).
Battery Replacement Procedure
Eventually, you’ll need to replace the battery:
- Turn off the multimeter and disconnect the test leads.
- Locate the battery compartment on the back of the unit.
- Remove the screw(s) securing the cover.
- Replace the old battery with a fresh one of the same type (usually 9V).
- Secure the cover and test the meter.
A low battery icon on the display is your first indication that a replacement is needed. I change mine about once a year with regular use.
Troubleshooting Common Multimeter Issues
Even the best tools can have issues. Here are solutions to problems I’ve encountered:
Erratic or Inaccurate Readings
- Check that the test leads are fully inserted into the correct ports
- Replace the battery
- Ensure you’re using the correct measurement mode
- Check for damage to the test leads
Meter Won’t Turn On
- Replace the battery
- Check for loose battery connections
- Inspect for internal damage if the meter was dropped
Continuity Beeper Not Working
- Verify the meter is set to continuity mode
- Check volume settings if applicable
- Test the probes by touching them together
Display Shows “OL”
This typically means “overload” – you’re trying to measure a value beyond the selected range. Switch to a higher range or, for auto-ranging meters, check that you’re using the correct measurement function.
Creative Uses for Your Multimeter Beyond Basic Testing
As I became more comfortable with my multimeter, I discovered some unexpected applications:
Identifying Unmarked Wires
When installing a car stereo, I used the continuity function to trace which wire went where without having to disassemble the entire dash.
Testing Soil Moisture for Plants
By measuring resistance between two probes inserted in soil, you can get a rough idea of moisture content. Lower resistance generally indicates more moisture.
Checking Remote Control Batteries
When your TV remote acts up, a quick voltage test of the batteries can tell you if they’re the culprit.
Finding Hidden Metal
By using the continuity function, I’ve located studs behind walls by finding the screws that secure the drywall.
Final Thoughts: Why the Everstart Multimeter Earned a Permanent Place in My Toolbox
After three years and countless projects, my Everstart Multimeter has more than paid for itself. From saving me from unnecessary parts replacements to empowering me to take on projects I would have previously hired out, this simple tool has transformed my approach to troubleshooting.
The Everstart Multimeter strikes an ideal balance between capability and simplicity, between professional features and DIY accessibility. It’s accurate enough for all but the most demanding applications, durable enough to withstand regular use, and affordable enough that anyone serious about DIY work can justify the investment.
Whether you’re a car enthusiast trying to diagnose an electrical gremlin, a homeowner wanting to check outlets before plugging in expensive electronics, or just someone curious about how things work, an Everstart Multimeter will quickly become one of your most-reached-for tools.
Remember that first day when I stood confused in the automotive section? Now I can’t imagine tackling a project without my trusty Everstart by my side. The greatest value of the Everstart Multimeter isn’t just in the measurements it takes, but in the confidence it gives you to understand and master the electrical systems in your life.
So if you’ve been hesitating, wondering if you really need a multimeter or if you’d ever use one, take it from someone who was once in your shoes: The Everstart Multimeter is the key that unlocks a whole new dimension of DIY capability. And the best part? You don’t need to be an electrical engineer to use one – just a willingness to learn and a healthy respect for electricity.
What electrical mysteries are hiding in your home or vehicle, waiting to be solved? With an Everstart Multimeter in hand, you’re equipped to find out.